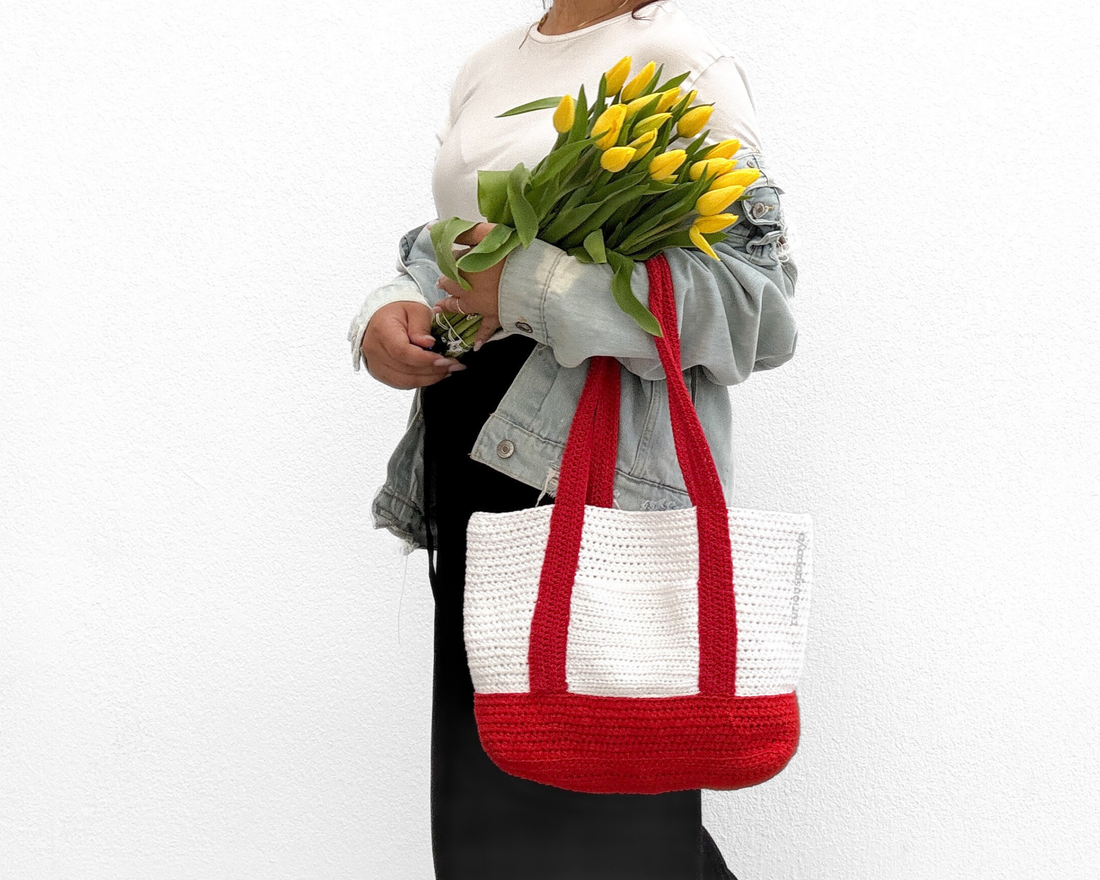
This versatile tote bag features a spacious gusset bottom and two side pockets. Dress it up with your favorite bag charm, embroidery pins, or iron-on patches!
MATERIALS:
Click here for a list of my favorite tools.
-
#3 light worsted yarn - Hobbii Rainbow Cotton 8/6
- 3 skeins of Red (058)
-
4 skeins of White (001)
- Note: This pattern involves holding two yarns together or double stranding and the amounts of yarn listed are as follows. Double-stranding the yarn will allow the tote bag to be more structurally sound. If modifying this pattern by working with a single strand and its corresponding hook size, note the modifications for the straps and pocket. Doing so will provide more structure for the base of the tote.
- 2.25 mm hook and 3.75 mm hook
- Scissors
- Stitch markers
- Sewing pins
- Yarn needle
NOTES:
- Please do not copy/redistribute any part of this pattern as your own. This includes reposting/translating without permission. Feel free to sell your finished products in small quantities as long as you give credit to help support my work. Tag your creations with #curiouspapaya so I can feature you!
- This pattern is made in two parts and then crocheted together at the seam.
- This pattern is written in US terminology.
- Difficulty: intermediate-beginner+
- Measurements: 14 in x 9 in (excluding straps)
ABBREVIATIONS:
- blo: back loops only
- ch: chain
- hdc: half double crochet
- sc: single crochet
- slst: slip stitch
- st(s): stitch(es)
- rnd(s): round(s)
- [#]: stitch count
- (...) x #: repeat instructions the number of times
PATTERN:
BASE (using 2 strands of Red yarn + 3.75 mm hook):
If you prefer the premium PDF, you can find it HERE. Thank you for supporting!
- Row 1: Make a slipknot and ch 44. Work into second ch from hook, make 43 hdc down the ch, turn [43]
- Rows 2-12 (11 rows total): ch 2, hdc down the row, turn [43]
- Row 13: ch 2, 43 hdc [43]
Next, we will make the border. Make the first corner by making *ch1, sc* into the current st. For the remaining corners, work *sc, ch 1, sc* into the same st.

- Step 1: work along the left short edge, 13 sc, *corner* [15 sc + 1 ch]
- Step 2: work along the bottom long edge, 42 sc, *corner* [44 + 1 ch]
- Step 3: work along the right short edge, 13 sc, *corner* [15 sc + 1 ch]
- Step 4: work along the top long edge, 42 sc, skip the corner bc we already made it, slst into the first st to join the rnd [42]
Total, you will have 116 sts + 4 ch for a total of 120 sts.
Next, we will work up the sides and will work in joined rounds.
- Note: The seamline where you join each rnd may slightly shift to the right. We will cover most of it with the pocket during assembly.
- Rnd 14: (blo) ch 2 (counts as the first hdc), hdc all around including the ch 1 corners, slst into the first st to join the rnd [120]
- Rnds 15-20 (6 rnds total): ch 2, hdc all around, slst into the first st to join the rnd [120]

Fasten off and leave a short yarn tail to weave in. Count 10 sts backward from where you fastened off and join White yarn into the blo.
In the next rnd, we will use a technique that will create a crisp color change line (rather than a zig-zag one). Rnd 21 will be split into "part a and b". Crochet over the yarn tails as you work, or, weave them in at the end.
- Rnd 21a: (blo) ch 1 (counts as the first slst), loosely slst all around, slst into the first st to join the rnd [120]
- Rnd 21b: ch 2, (blo) hdc all around, slst into the first st to join the rnd [120]
- Rnds 22-41 (20 rnds total): ch 2, hdc all around, slst into the first st to join the rnd [120]
Fasten off and leave a yarn tail to weave in.

POCKET (in one strand of White yarn + 2.25 mm hook; make two):
-
Modification note: If working single stranded for a smaller tote bag, modify the width of the pocket to be 1/3 the width of the tote bag. For the base pattern, I did the following:
- Row 1: Leave a tail for sewing before making a slipknot. ch 29. Work into second ch from hook, make 28 hdc down the ch, turn [28]
- Rows 2-16 (15 rows total): ch 2, hdc down the row, turn (except for the very last row) [28]
Fasten off and leave another long tail for sewing.
STRAPS (in one strand of Red yarn + 2.25 mm hook; make two)
- Note: Modify the length as desired. Because the last row will end on the same side as the starting tail, you will need to join yarn for sewing the other side of the strap during assembly.
- Row 1: Leave a short tail for weaving in before making a slipknot. ch 161. Work into second ch from hook, make 160 hdc down the ch, turn [160]
- Rows 2-5 (4 rows total): ch 2, hdc down the row [160]
Fasten off and leave a long tail for sewing.

ASSEMBLY:
- Step 1: Align the pocket with the center of the tote bag, sitting flush with the red base. Secure them in place using sewing pins, making sure they are symmetrical on both sides.

- Step 2: Use the yarn tail you fastened off with to sew the left side and the bottom of the pocket being careful to not pierce through the inside of the bag.

- Step 3: Use the starting yarn tail to sew up the right side. Weave in excess yarn tails.
- Step 4: Repeat these steps for the back pocket.
- Step 5: Position the straps to both sides of the pockets and secure them in place using sewing pins.
- Step 6: Sew along the perimeter (instead of whipstitching) as the photo indicates. Alternatively, you may sew going through the "third loops" of the red strap.

PERSONALIZE IT:
There are endless ways to dress up this adorable tote bag. Below are some ideas:
- Sew on crochet appliqués
- Embroider flowers onto the pocket
- Create a keychain to hang onto the strap, like my FRUIT SLICES, SIMPLE BOW, or TOMATO
- Take your favorite crochet plushie along with you in the front pocket


You're finished! If you enjoyed this pattern, I would love to hear about your thoughts in the comments. Be sure to tag me if you share your creations on social media!
Cheers,
Amy