Who’s ready for spooky season?! (I sure am… but of course with my extra flair!)
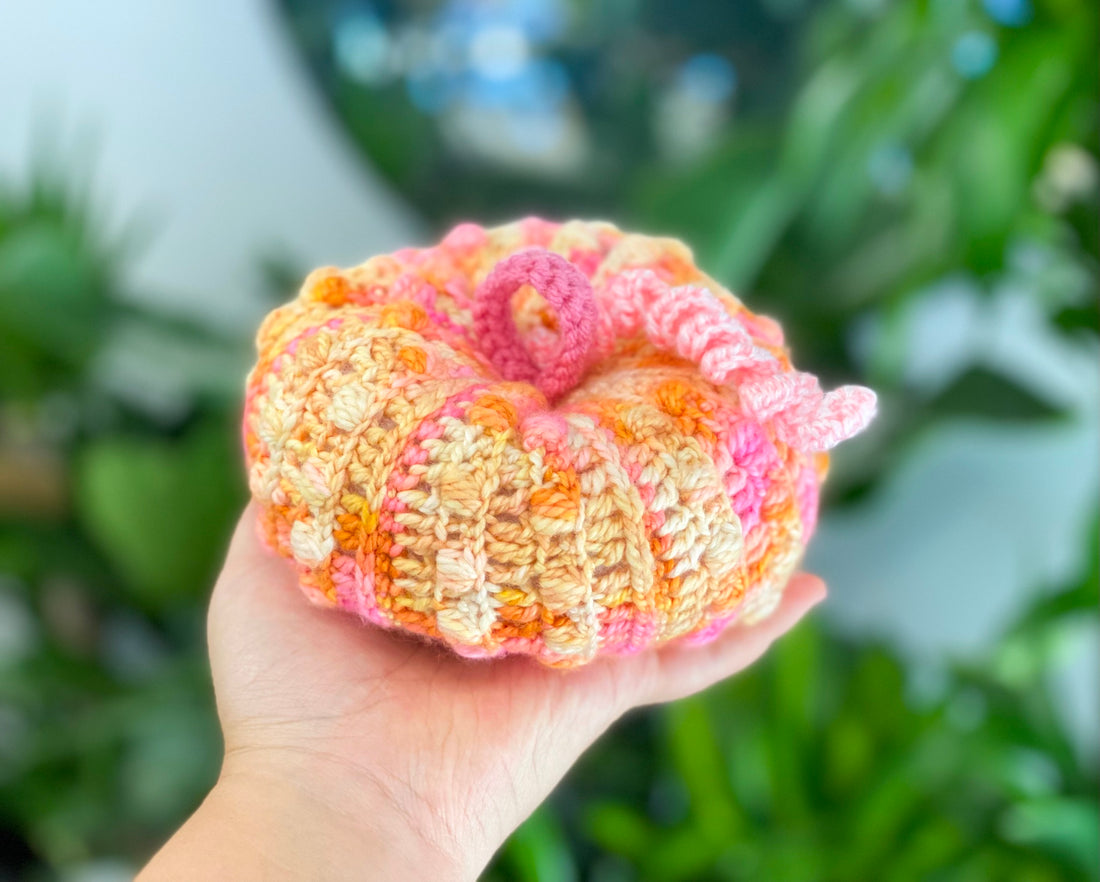
What better way to get into the mood than with crocheted pumpkins? I personally LOVE the unique ones. The more bumps and curves, the better! That’s why I created this design for my textured pumpkin. And of course I had to make them with pastel colors.
What’s great is that you can modify the pattern by using different hook sizes or different yarn weights to make other sizes as well. If using the prescribed materials, your pumpkin will measure 7 in. x 4.5 in. [17.71 cm x 11.5 cm].
Note: Please do not copy/redistribute any part of this pattern as your own. Feel free to sell your finished products in small quantities - I only ask that you give credit to help support my work :). I would also love for you to share photos of your cute creations made with my pattern by tagging me on Instagram @curiouspapaya. Thank you!
*We will be working in rows.
MATERIALS:
-Check out the list of my FAVORITE CROCHET TOOLS.
-Any medium worsted yarn (variegated yarn is the best for this project) for the pumpkin and then TWO contrast colors for the stem and leaf
-Size 3.75 mm hook
-Yarn needle, scissors, stitch markers
-Fiber fill stuffing
TERMS:
- BLO – back loops only
- PS – puff stitch (YO, pull up a loop) x 4 so you have a total of 9 loops around your hook. YO and pull through all 9 loops. CH 1 to close up the puff stitch.
- CH – chain
- DC – double crochet
- FLO – front loops only
- HDC – half double crochet
- SC – single crochet
- ST(s) – stitch(es)
- INC – increase
- SLST – slip stitch
- WS/RS – wrong side/right side
- YO – yarn over
- [#] – stitch count
- (…) x # – repeat the instructions within the parentheses # of times
PUMPKIN (in main color):
*You can also find the premium, printable PDF HERE if you prefer. Please note that this pattern is able to remain free due to the ads on this page. Thank you for your support!
STEP 1: CH 31. Starting in the second CH from the hook, SC down the row. [30]
ROW 1: CH 1, turn. (FLO) – 4 SC, (2 SC, PS) x 7, 5 SC [30] *The PS are an exception from the FLO. Make sure to go through both loops for these STs. Use a stitch marker to mark the CH STs.
ROW 2: CH 2, turn. (BLO) – DC down the row. [30] *Be sure to skip the CH stitches from the PS from the row before or your ST count will be off!
ROW 3: CH 1, turn. (FLO) – 4 SC, (2 SC, PS) x 7, 5 SC [30]
ROW 4: CH 2, turn. (BLO) – DC down the row. [30]
ROW 5: CH 1, turn. Working into the third loop of each ST, SC down the row. *The third loop is visible when the WS of the piece is facing you. This is right under the “v-shaped” SC ST. [30]
ROW 6: CH 2, turn. DC down the row. [30]
Repeat ROW 1-6 a total of 7 sequences to make a long rectangle.
When finishing up on the last repetition, skip row 6. This is because we will be stitching the two shorter ends of the rectangle closed.


ASSEMBLY:
STEP 1: To close up the pumpkin, leave the hook and working yarn intact (*don’t fasten off!). Fold your rectangle in half with the RS facing outwards. You may need to readjust the working yarn so that you can hold it properly. SLST the edges closed by going through both loops of the last row we worked and the foundation chain. Leave a long tail for sewing.

STEP 2: Use your yarn needle and weave in and out of the longer edges on one side and cinch it closed. Secure the hole closed by weaving in an “X” shape on that end.

STEP 3: Bring the yarn tail over to the other side and repeat step 2. Before you cinch it completely closed, stuff your pumpkin. Be careful not to overstuff it or the stuffing will show through your stitches too much!
STEM (in contrast color 1):
STEP 1: CH 21. Starting in the second CH from the hook, SLST down the row. CH 1, turn.
ROW 1: (FLO) – SLST down the row. CH 1, turn.
ROW 2: (FLO) – SLST down the row.
Fasten off, leaving a tail for sewing.
Fold the stem in half and then use your yarn needle to sew the ends together into a loop. Sew the stem onto the pumpkin.
LEAF (in contrast color 2):
STEP 1: CH 30. Starting in the third CH from the hook, work 3 HDC into each ST. This will create a curly cue.
Fasten off, leaving a tail for sewing. Sew it near the stem and bury the tail.
And that’s it! You’re finished! These textured pumpkins make the perfect Fall-decor – that pop of pastel color also makes it great to hangout year round.
If you enjoyed this pattern, please feel free to leave a comment below. Subscribe to my newsletter to stay in touch with the latest pattern releases and roundups. Cheers! -Amy
4 comments
I love this bumpy pumpkin! It is just too cute! Thank you!😊
Have subscribed two times but have not yet received email for the free pumpkin pattern. I really would like the pattern.
I have also subscribed twice and still have not received the pumpkin pattern – Thank for looking into this problem.
Have subscribed twice actually but have not received email for the pumpkin pattern.